Characters
| THE MAIN ITEMS | |
|---|---|
| Locations | |
| Objects | |
| Tasks | |
| Characters | |
| Events | |
| Variables | |
| Groups | |
| Properties | |
| Text Overrides | |
| Hints | |
| Synonyms | |
| User functions | |
Contents
Description
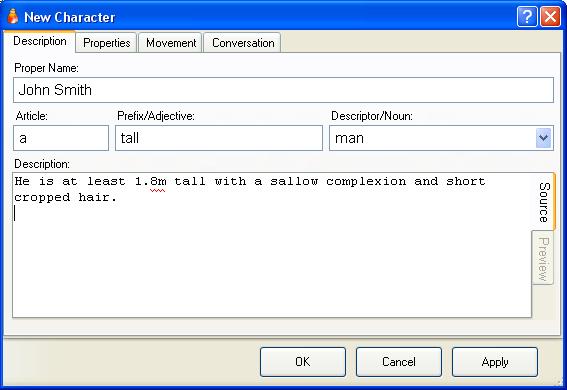
When you create a new character, or edit an existing one, you will see this window:
The Proper Name is the actual name of the character. This name is displayed to the player when the character is in the same location, and is entered by the player when they want to refer to the character.
This is only used if this character has the "Known to player" property.
If not, then the Article, Prefix/Adjective and Descriptor/Noun are used to describe what the character looks like, and can be entered by the player to refer to the character.
More than one noun can be entered, on different lines, and the player can use any of them to refer to the character.
The adjectives are optional, except where two characters in the same location use the same noun and it is necisary to distinguish between them.
If the character is described as "a tall thin chinese man" then the player can enter any combination of adjectives, such as "tall chinese man", "thin man", "tall thin man" etc.
A character can start out as unknown to the player but later learn their name. In this case you would use a task to set the "Known to player" property when they learn their name.
The "Description" text box is what is displayed when the player examine's the character.
For more information on how to use character names, see Character Name substitution
Properties
Properties allow you to customise everything about the character, specifying where they are, whether they are sitting, standing or laying down, what gender they are, how much they can carry, and many other attributes.
A property is similar to a variable, both store a value, but whereas there is only one copy of a variable for the whole game, each character has its own copy of each of the character properties.
The "Description" page of the character contains their name and description, but most of the standard library properties, and all of the properties you create yourself, are listed on the properties page.
Properties on description page
- Proper name - The name that ADRIFT uses when refering to this character, but only when the "Is this character known to the player" property is set.
- The Article, Adjective and Noun fields are not individually accessable, but you can read the three properties together using the %character%.Name function
- Description - The contents of this text box is printed, as the first part of the character description, when the player "examine"s this character.
Properties on Properties page
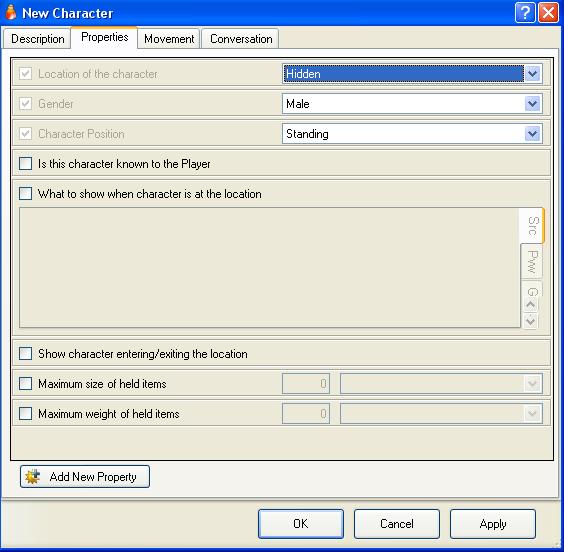
This is the default properties page of a character:
Here you can select various properties of this character.
- Location of the character.
- Hidden - A hidden character is not at any location and cannot be found by the player.
- At Location - When this is selected the "At which location" property becomes available and you can select which location you want the character to start at.
- On object - The character can be sitting on a chair or laying on a bed. Only objects with the "supporter" property can be selected.
- In object - You can select from objects that have the "Object is a container" and "characters can go inside this object" properties.
- On character - This character is on another character, ie. a parrot on a pirates shoulder, someone sitting on a horse, or just someone getting a piggyback ride.
- Gender - Select male, female or unknown.
- Character position - Usually standing, but characters can be sitting or laying on something.
- Is this character known to the player - Select this if you want this character refered to by the "Proper Name" field at the start of the game.
- What to show when character is at the location - Normally Adrift just says something like "John smith is here". If you want a more detailed description then put it in this text box.
- Show character entering/exiting location - If the character has a walk set and enters or leaves the players location then this will tell the player.
- Selecting this will show two text boxes that allow you to provide your own description.
- Maximum size of held items - Puts a limit on the size of objects the character can carry (normally only used for the player character).
- Maximum weight of held items - How much weight this character can carry.
To use the value of a property in an expression or a text box, use a character function.
If you create new character properties then they will be added to this page for all characters.
To create a new character property, click the "Add new property" button. This will bring up the New Property dialog box and default it to "Property of: Characters".
Movement
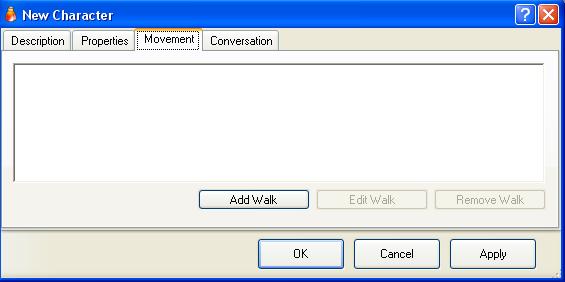
The movement page allows you to program one or more routes that this character will follow, and actions they will perform at certain times.
Each of these independant routes and its associated actions is called a "Walk".
A character can have several walks, but will follow one walk at a time.
Clicking "Add Walk" will open the new walk dialog which allows you to specify when the character will start a particular walk, the path they will follow, and activities they will perform along the way.
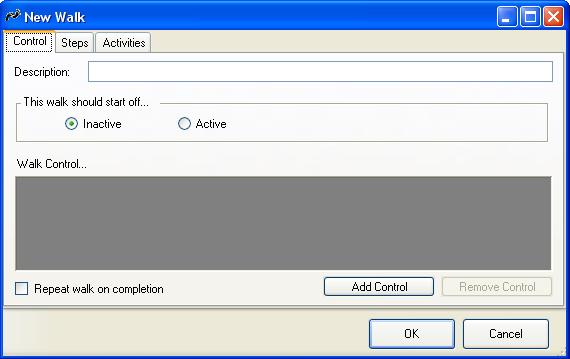
This dialog box has three tabbed pages: Control, Steps and Activities.
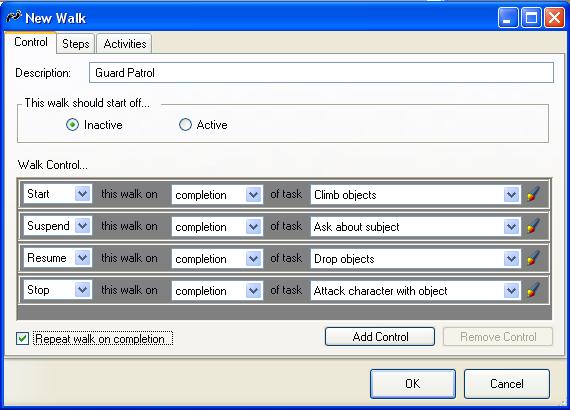
On the control page you can give the walk a description and select whether the character should start following this walk when the game starts by making it "Active".
Each time the "Add Control" button is pressed it adds one Walk Control. In the following image we have added 4 of them.
A walk control can start, suspend, resume or stop the character from following this walk.
Each control is triggered by the completion of a specific task (or by an Action unsetting a task).
The ![]() button can be used to create a new task.
button can be used to create a new task.
The box at the bottom left can be ticked to have the walk repeated continuously, otherwise is will run once and then stop.
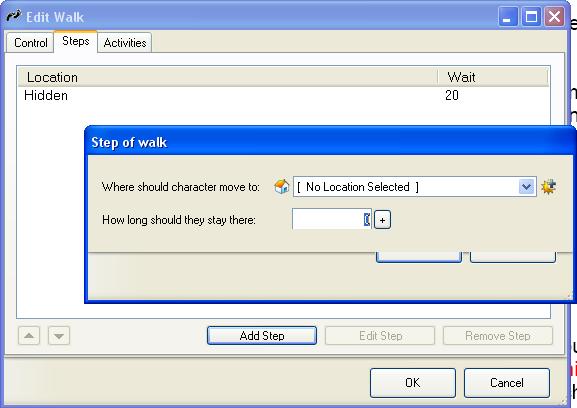
On the "Steps" page you can create the individual stages of the walk:
A step consists of a destination and a length of time to stop at that destination before moving on to the next step.
Press the "Add Step" button to create a new step and open the "Step of Walk" dialog box.
Note that the house icon is a button that selects between 3 types of destination.
![]() - You can select a location (or "Hidden") for the character to go to.
- You can select a location (or "Hidden") for the character to go to.
![]() - Select a Character. This character will move to the same location as the selected character. You could use this to have a henchman follow the player character wherever they go.
- Select a Character. This character will move to the same location as the selected character. You could use this to have a henchman follow the player character wherever they go.
![]() - Select a Location Group. This character will move to an adjacent location in the group, or if there isn't one, to a random location in that group.
- Select a Location Group. This character will move to an adjacent location in the group, or if there isn't one, to a random location in that group.
You must also specify how long the character should stay at that location before moving on to the next step of the walk. For a fast moving character, this might just be 1.
By pressing the "+" button you can enter a minimum and maximum period to stay at that location. The character will randomly choose a number between the two values to determine how long to stay.
![]() The two buttons at the bottom are cutoff by a bug. They are "OK" on the left and "Cancel" on the right.
The two buttons at the bottom are cutoff by a bug. They are "OK" on the left and "Cancel" on the right.
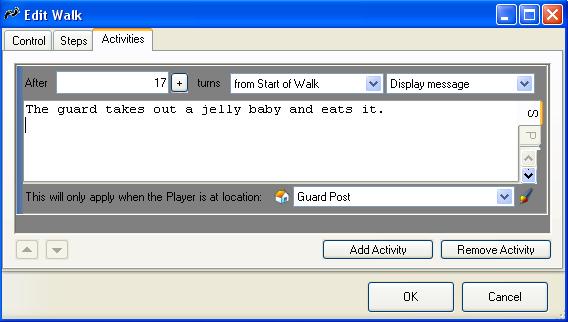
The Activity page looks like this:
Pressing the "Add Activity" button adds an activity panel, similar to the one shown, to this page.
These operate in a similar way to Events.
You can specify a certain number of turns from the Start of the walk, from the last sub-walk, or before the end of the walk, to wait before starting this activity.
Using the "+" button you can specify a minimum and maximum number of turns to wait.
Alternatively, you can select "Character comes across" and specify another character or an object that will trigger this activity if this character moves into the location that contains them.
If the next drop-down list has "Display message" selected, then triggering this activity will cause the contents of the following text-box to be shown.
At the bottom of the activity pane you can also specify a restriction that the text box will only be displayed if the player is at a specific location.
The text box can use Alternate Descriptions to modify the output, depending on other restrictions.
If you also need an activity to perform Actions, then change "Display message" to "Execute task" and select a task from the drop-down list (or create a new one with the ![]() button).
button).
An activity can also unset a task (So a non-repeatable task can be executed again).
Conversation
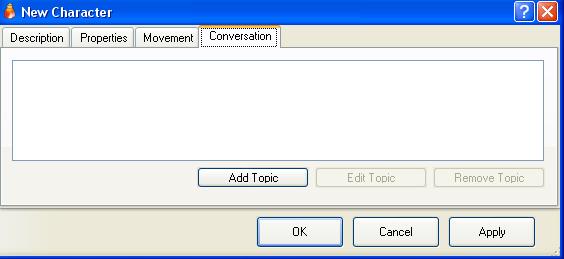
The conversation page initially looks like this:
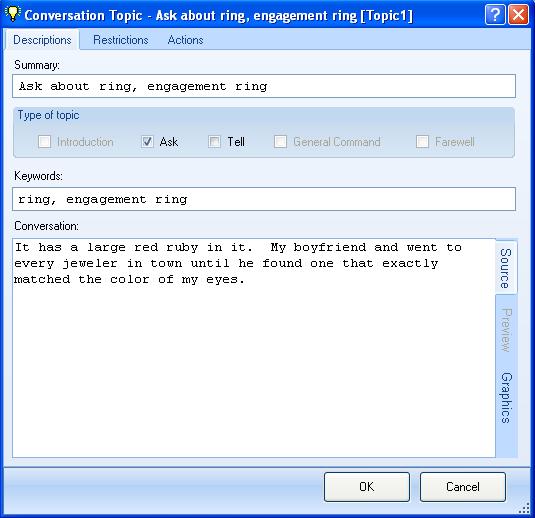
When you press the "Add Topic" button on the "Conversation" tab of a character, the conversation topic dialog opens:
The summary field is just a description to remind you what this conversation is about. The "Type of topic" checkboxes determine what commands this conversation responds to, and whether the next field is disabled (simple Introduction or farewell), A keyword list (Ask or Tell), or a general command. At the bottom is the Conversation text box which is the output of the conversation.
Ask is the equivalent of conversations in v4. Keywords can be specified, and are triggered on ask character about subject tasks. The keywords are listed using comma's to separate them as shown in the image above. Note that a keyword can actually be a short phrase rather than a single word.
Tell works the same as Ask, obviously with a tell character about subject task.
General Command allows you to set a statement of what can be said, using Advanced Command Construction or Wildcards, much like task command matching. These are triggered with a say <whatever> to character task.
The player is either in conversation with a character, or is not.
General Commands can be flagged as Introductions or Farewells. These become explicit introductions/farewells. That means the command will either enter you into conversation with a character, or leave the conversation with that character. So for example, you could create a general command "[hello/hi]". So if you then typed the command "say hello to campbell" it would enter the player into conversation with Campbell.
Introductions/Farewells can also be set without a general command. These become implicit introductions/farewells. If the player starts talking to a character without using an explicit intro, the implicit intro (if it exists) will kick in automatically before the particular command.
So for example, if the player isn't currently in conversation with Campbell and just types "ask campbell about adrift", and you have an implicit introduction defined, you might get the following:
   Campbell looks up from his computer as you start to speak. <- implicit intro
   "Hey Campbell, how're you getting on with ADRIFT?", you ask.
   Campbell smiles. "I'm getting there. Thanks for asking."
If, for example, you don't type an explicit farewell, such as "bye", and the conversation is ended (for example, you start conversation with another character, or you leave the room), any implicit farewells will be triggered. So for example, in the case about you might have:
   Campbell turns back to his computer and resumes coding furiously.  <- implicit farewell
   You move south.
Nodes are just each entry within the conversation tree. You might want to stay at a particular node within the tree until a specific choice is made, hence the checkbox.
You can use restrictions on the conversation nodes to prevent them from being asked a second time. Or if it's simply a matter of changing the displayed output, you can use the alternative descriptions within that node.
Conversation Tree's
- Conversation trees in ADRIFT work by the conversation being at a particular point in the tree.
- At each point in the tree, the player must match one node in the tree, else they fall back to the start.
- If they match a topic, they move down to that node's children.
- If a node has no children, the conversation also falls back to the start.
- If a node has the "stay in this node" checkbox selected, the conversation will stay at that point in the tree, therefore not fall back to the start.
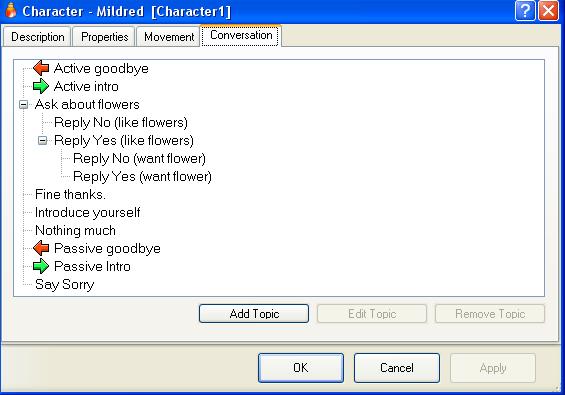
In this example, from the Conversation.taf sample, if the player asks this character about flowers then the "Ask about flowers" node will print some text and ask the player a question (do they like flowers) that they can reply yes or no to.
If the player says "yes" or "no" then this will trigger the "Reply no (like flowers)" or "Reply yes (like flowers)" node that is nested under the "Ask about flowers" node. If neither is entered, then ADRIFT goes back to the start and tries to match the players input to one of the top-level topics.
If the player says "yes" then the "Reply yes (likes flowers)" topic asks if the player wants the flower and the conversation moves to the topics nested below it, "Reply no (want flower)" or "Reply yes (want flower)".
Again, the player must say "yes" or "no" to match one of these topics, otherwise the conversation will go back to the start.
| <<< How tasks work | Main_Page | The Player Character >>> |
