Locked Doors
Many adventure games use locked doors to keep the player out of certain area's until they have completed earlier parts of the game and obtained the key from where it was hidden, or were given it by another character as a reward for completing a quest.
A locked door blocks the path between two locations, so it must exist as a static object in both of them.
You could place a separate door object at each location, but then it would be difficult to synchronise them so they are both open, closed or locked at the same time.
Fortunately ADRIFT provides a better way. You can place a single static object in several locations by using a location group.
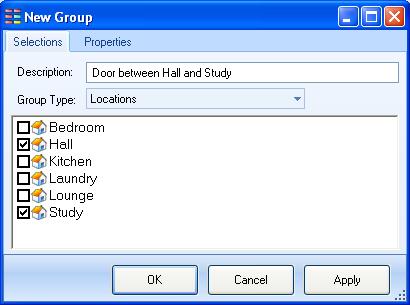
Open the "Groups" folder, right-click on it and select "Add Group" to open the New Group dialog.
In this example i am creating a door between a hallway and a study, so i enter an appropriate description, ensure the group type is set to "Locations", and click on the boxes next to those two rooms to tick them:
Press "OK" to save the group, and then add a new object to your "Objects" folder.
This will be the key that unlocks the door. Give it a name and a description then switch to the properties tab and make it a dynamic object so that the player can pick it up and carry it around.
Put the key somewhere the player can find it by setting its "Location of Object" and "At Location" properties.
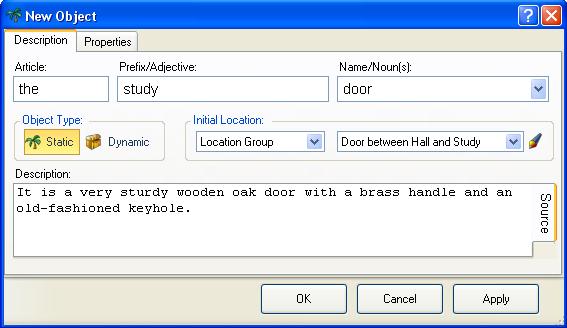
Create another new object. This will be our actual door object, so give it a name (wooden door, red door, study door) and a description.
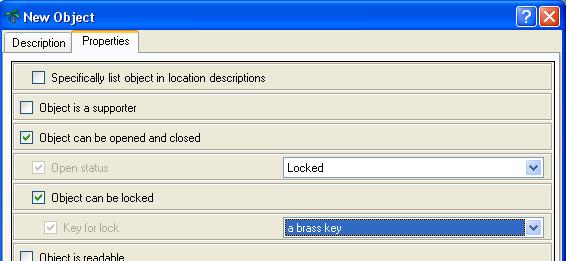
Select the Properties tab:
- Set the "Location of Object" to "Location Group" using the dropdown list.
- Set the "At Location Group" property to the location group you created above.
- select the following properties for your door:
- "Object can be opened and closed" (Selecting this allows you to select the next two dependant properties).
- "Object can be locked" (This adds Locked to the Open Status selections, and the Key for lock property).
- Change Open status to locked.
- Select your key object from the "Key for lock" dropdown.
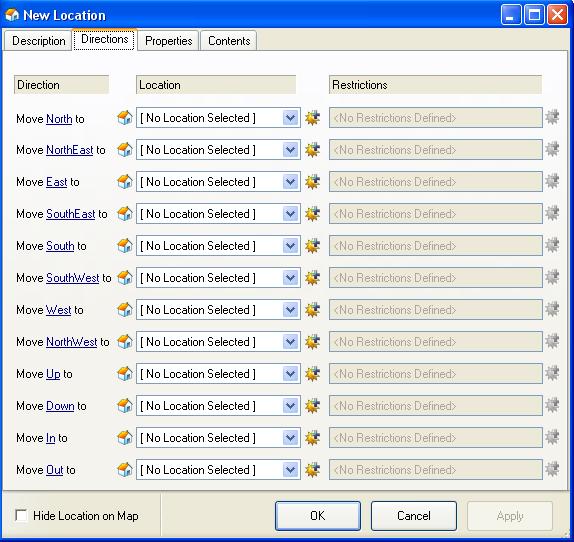
- Edit one of your door locations and select the Directions tab.
- Add a new restriction to the direction that leads to the otherside of the door. Make this restriction:
   * Object - your door - must - be in state - open
   * Depending on your settings this restriction may be copied to the second location. If not duplicate the restriction in the second location.
- The door will now block progress until it is unlocked and opened.
Describing the two sides of the door differently
If you want the two sides of the door to have different descriptions then you can create Alternate Descriptions using restrictions on which of the two locations the player is in.
Latched Doors
When a game requires the player to periodically return to a home base it will often provide a short-cut to a later area that only becomes available after the player has completed that area.
One way to do this is to have a door that can only be opened from one side.


